New post over at my home design blog!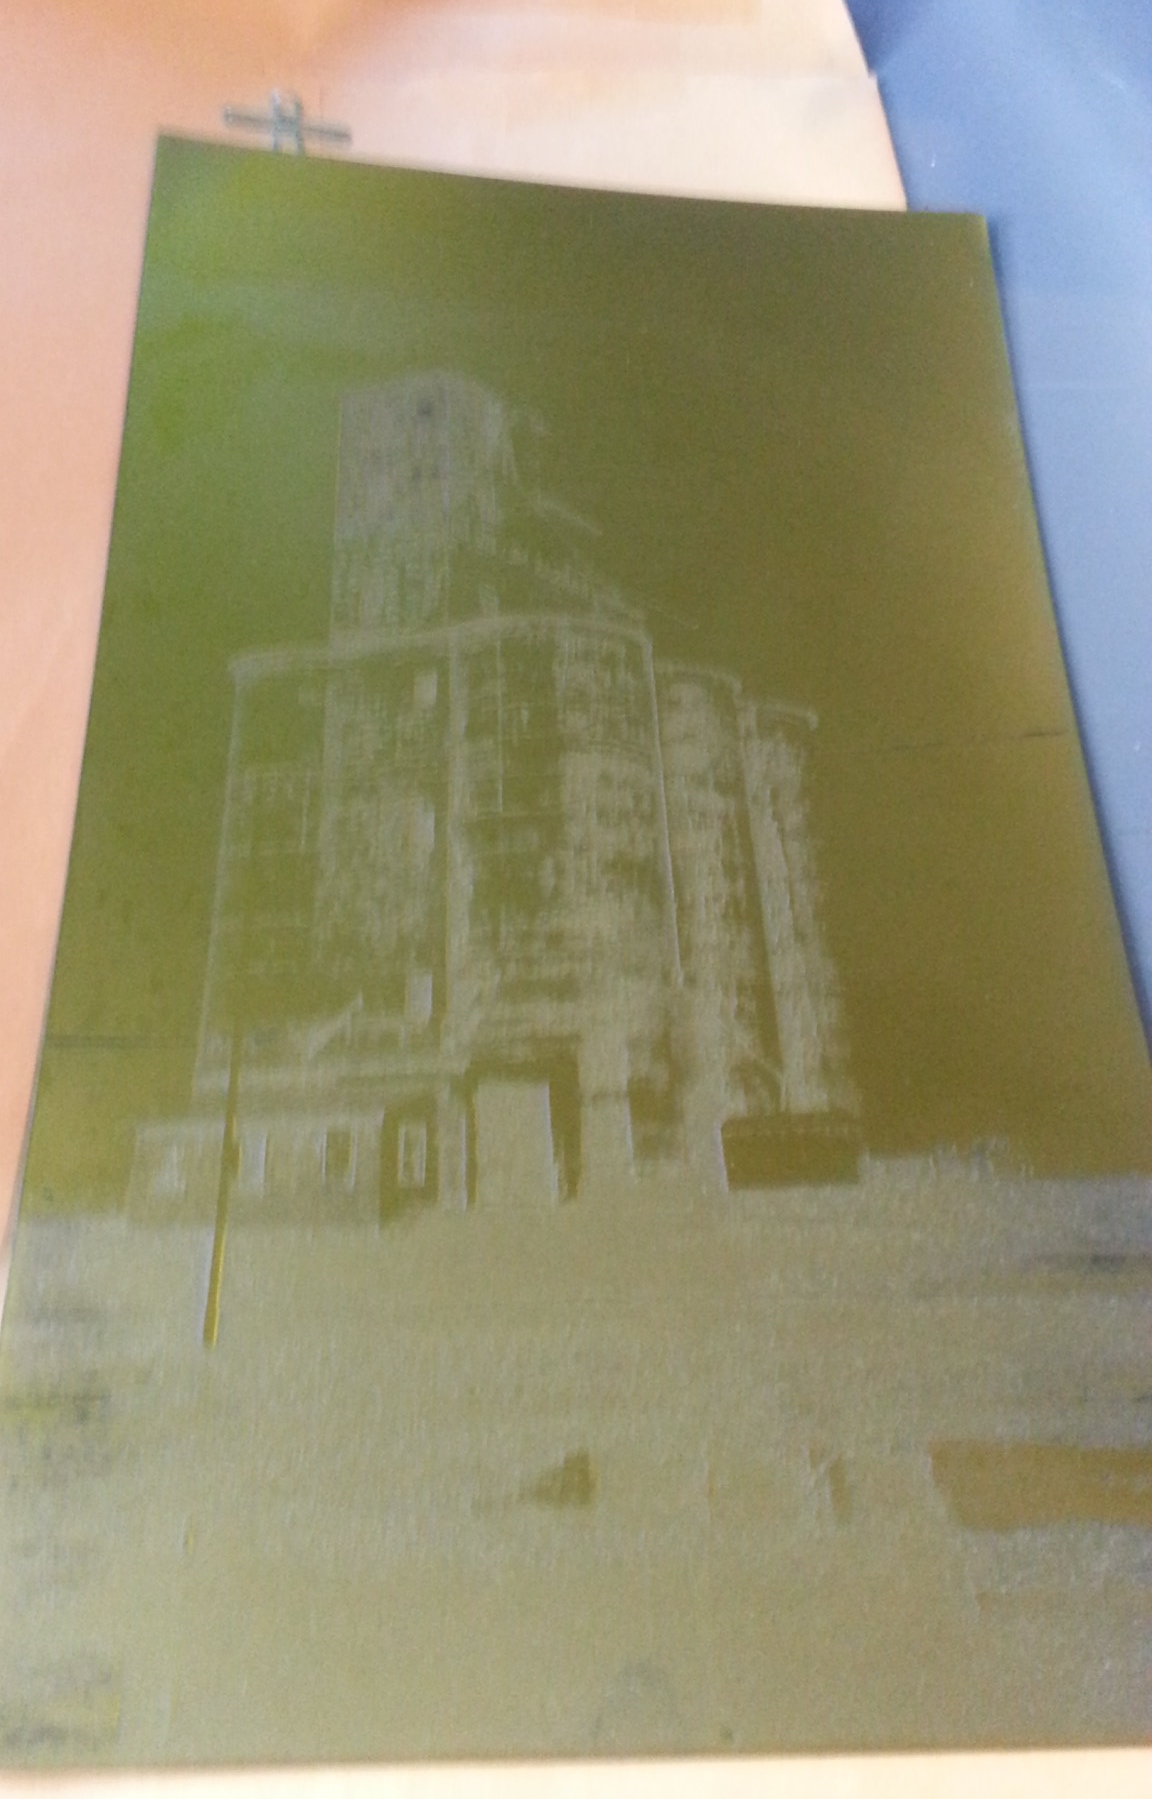

https://housearchitect.wordpress.com/2016/11/01/eight-principles-of-home-design-and-art

New post over at my home design blog!
https://housearchitect.wordpress.com/2016/11/01/eight-principles-of-home-design-and-art

Here is a picture of the original copper plate used to print Midway Lights. Notice the image is reversed from the actual print. I love the reversal of image when printing! I can’t wait to pull a print the first time! Just as we read left to right an artist has a certain way of creating images. I tend to balance right so printmaking has taught me an entirely new way to create images!

Midway Lights copper plate
The edition is complete and signed at 20. I need to change, scar or deface the plate so additional identical prints of the original 20 can not be printed. I took a beforehand keepsake picture as I will soon alter the plate.

Steam Roller Printing Explained Step by Step
This print was created during a class at the Lawrence Art Center. The finale was May 30th 2014 when a Steam Roller was used to print the plate during the Art Tougeau event.

initial image

Using router to make first cuts on wood cut. Router was used to clear lager areas of plate. Image was drawn on plywood sheet 48″ x 32″ using a sharpie
Step 2 thru 20,00o!
Many many cuts by hand 
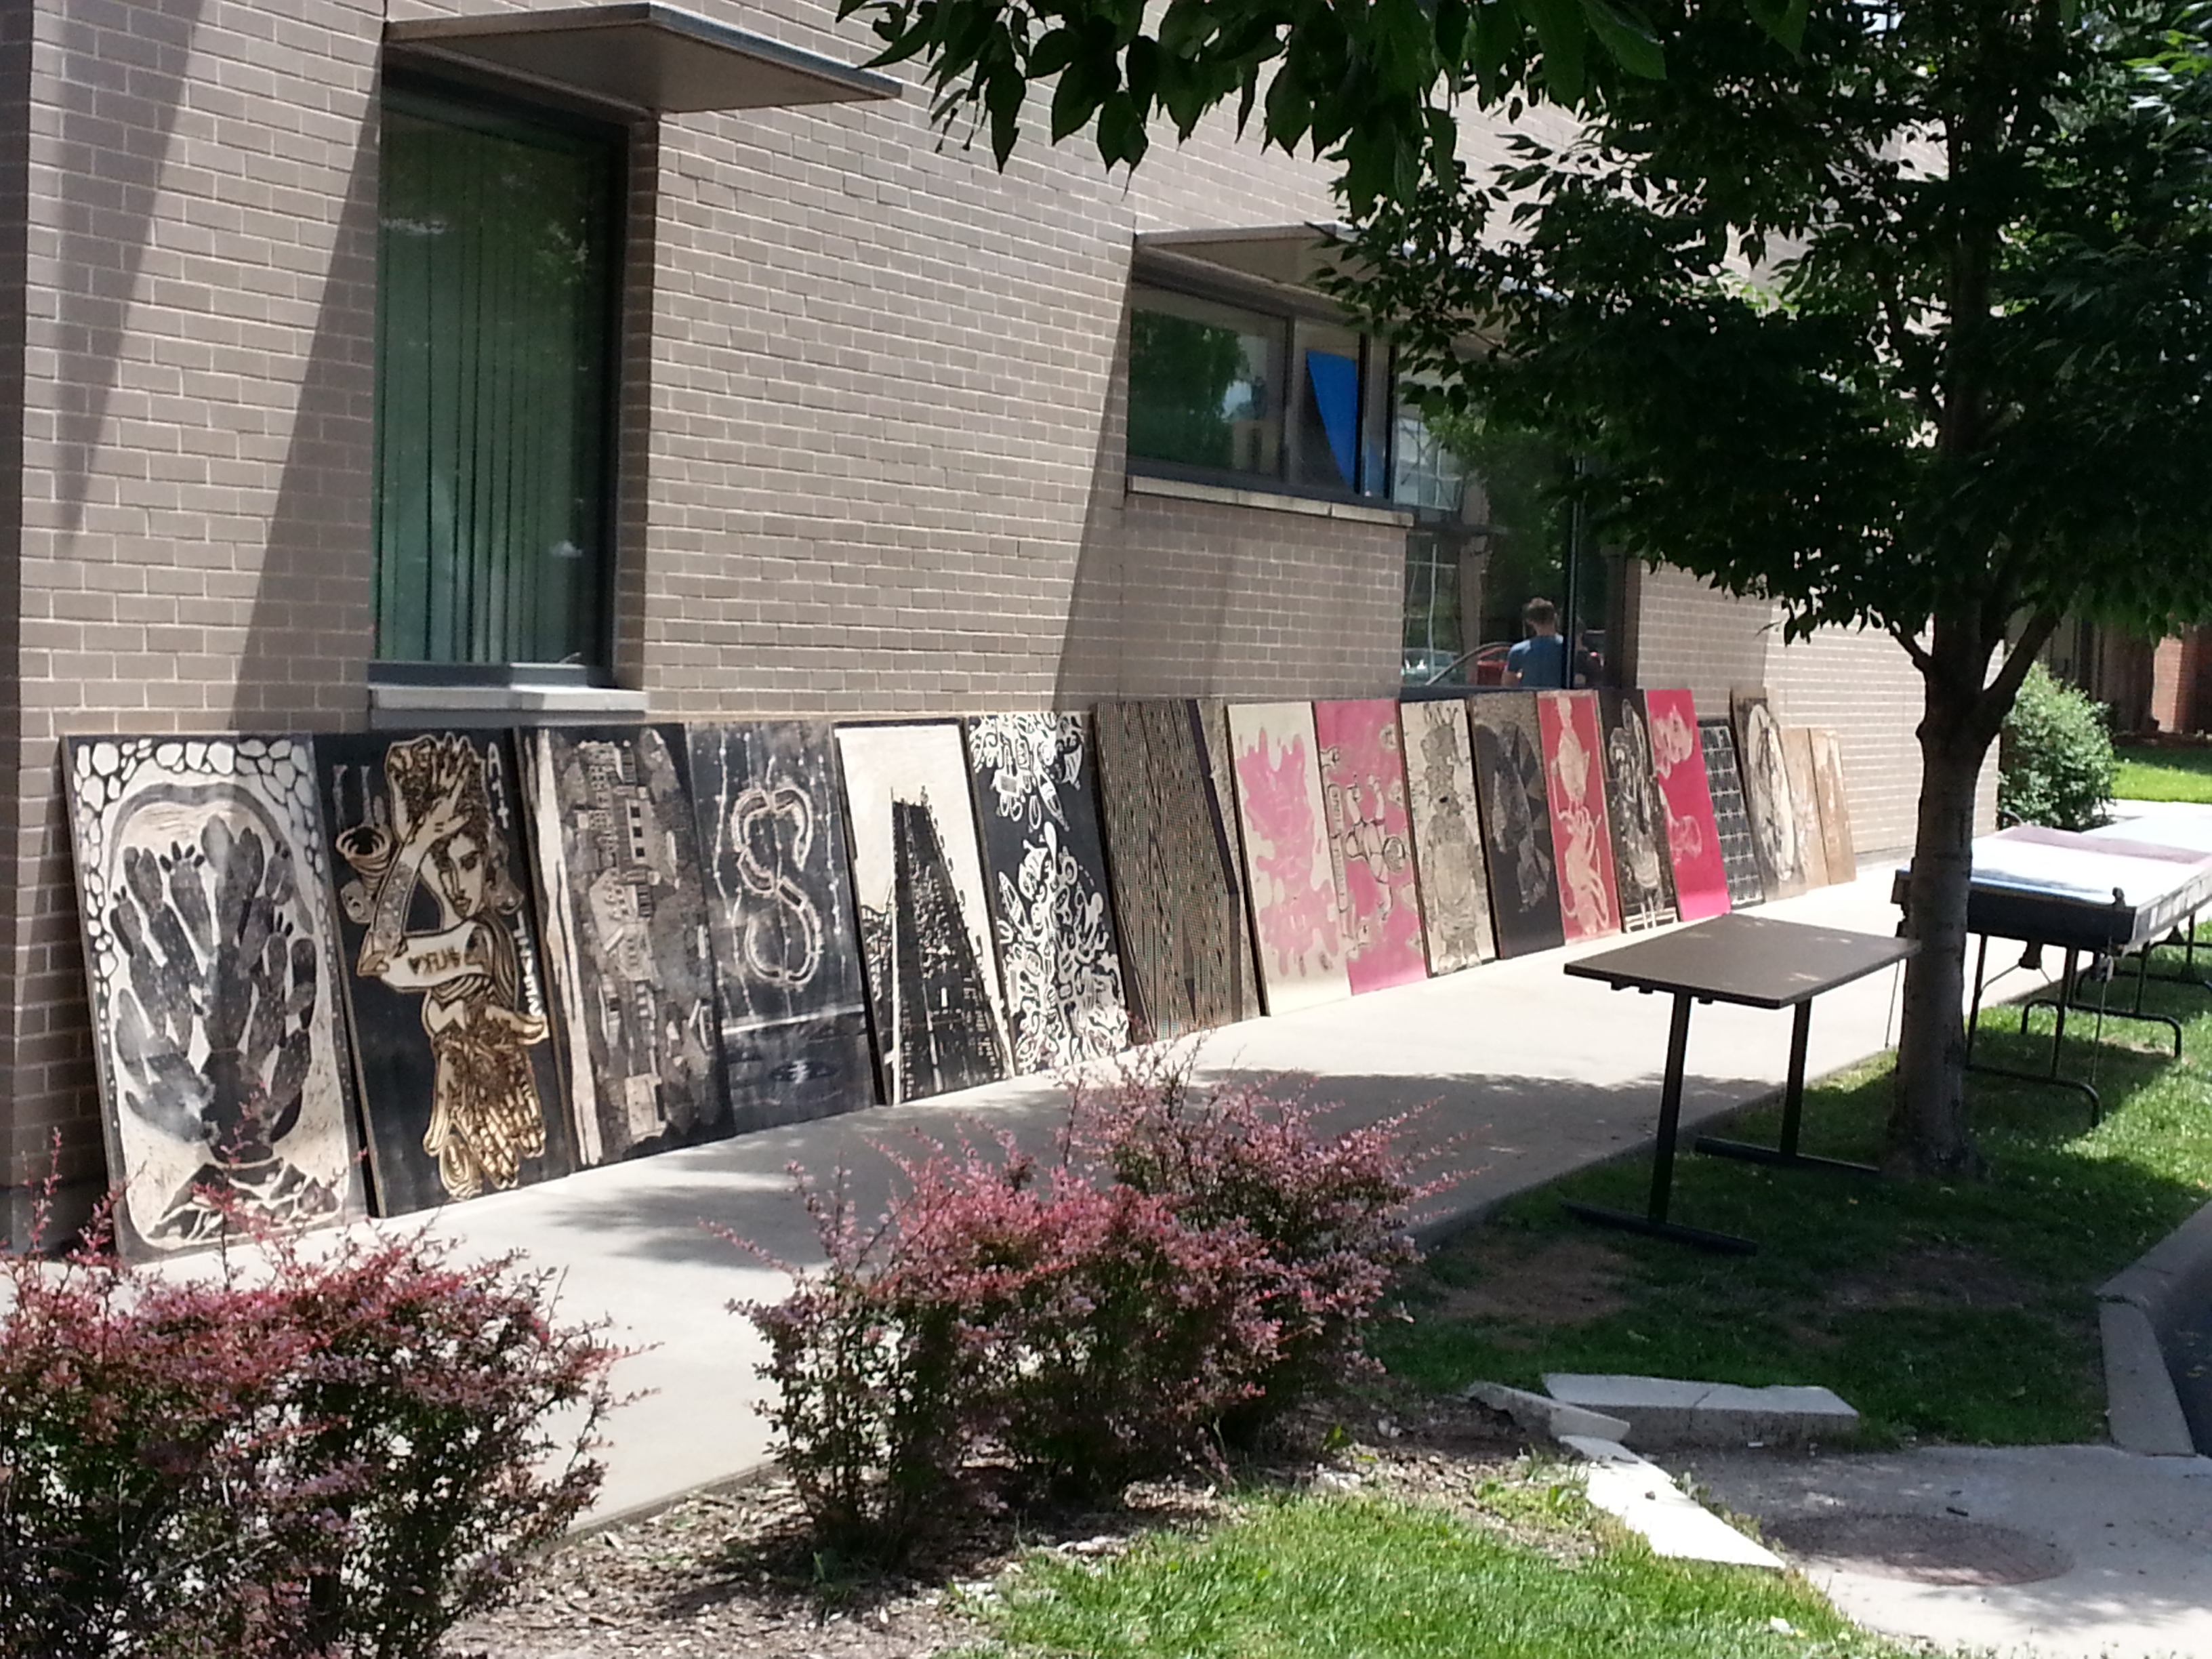
Carved plywood and MDF plates waiting to go at Lawrence Arts Center!
Step 3 priming finished plate

Plate being inked!

Plate moved to street!

Paper being placed on plate, centered aligned and straight!

Steam roller. Standing on plate until steam roller engaged it keeps it from sliding and smearing ink!
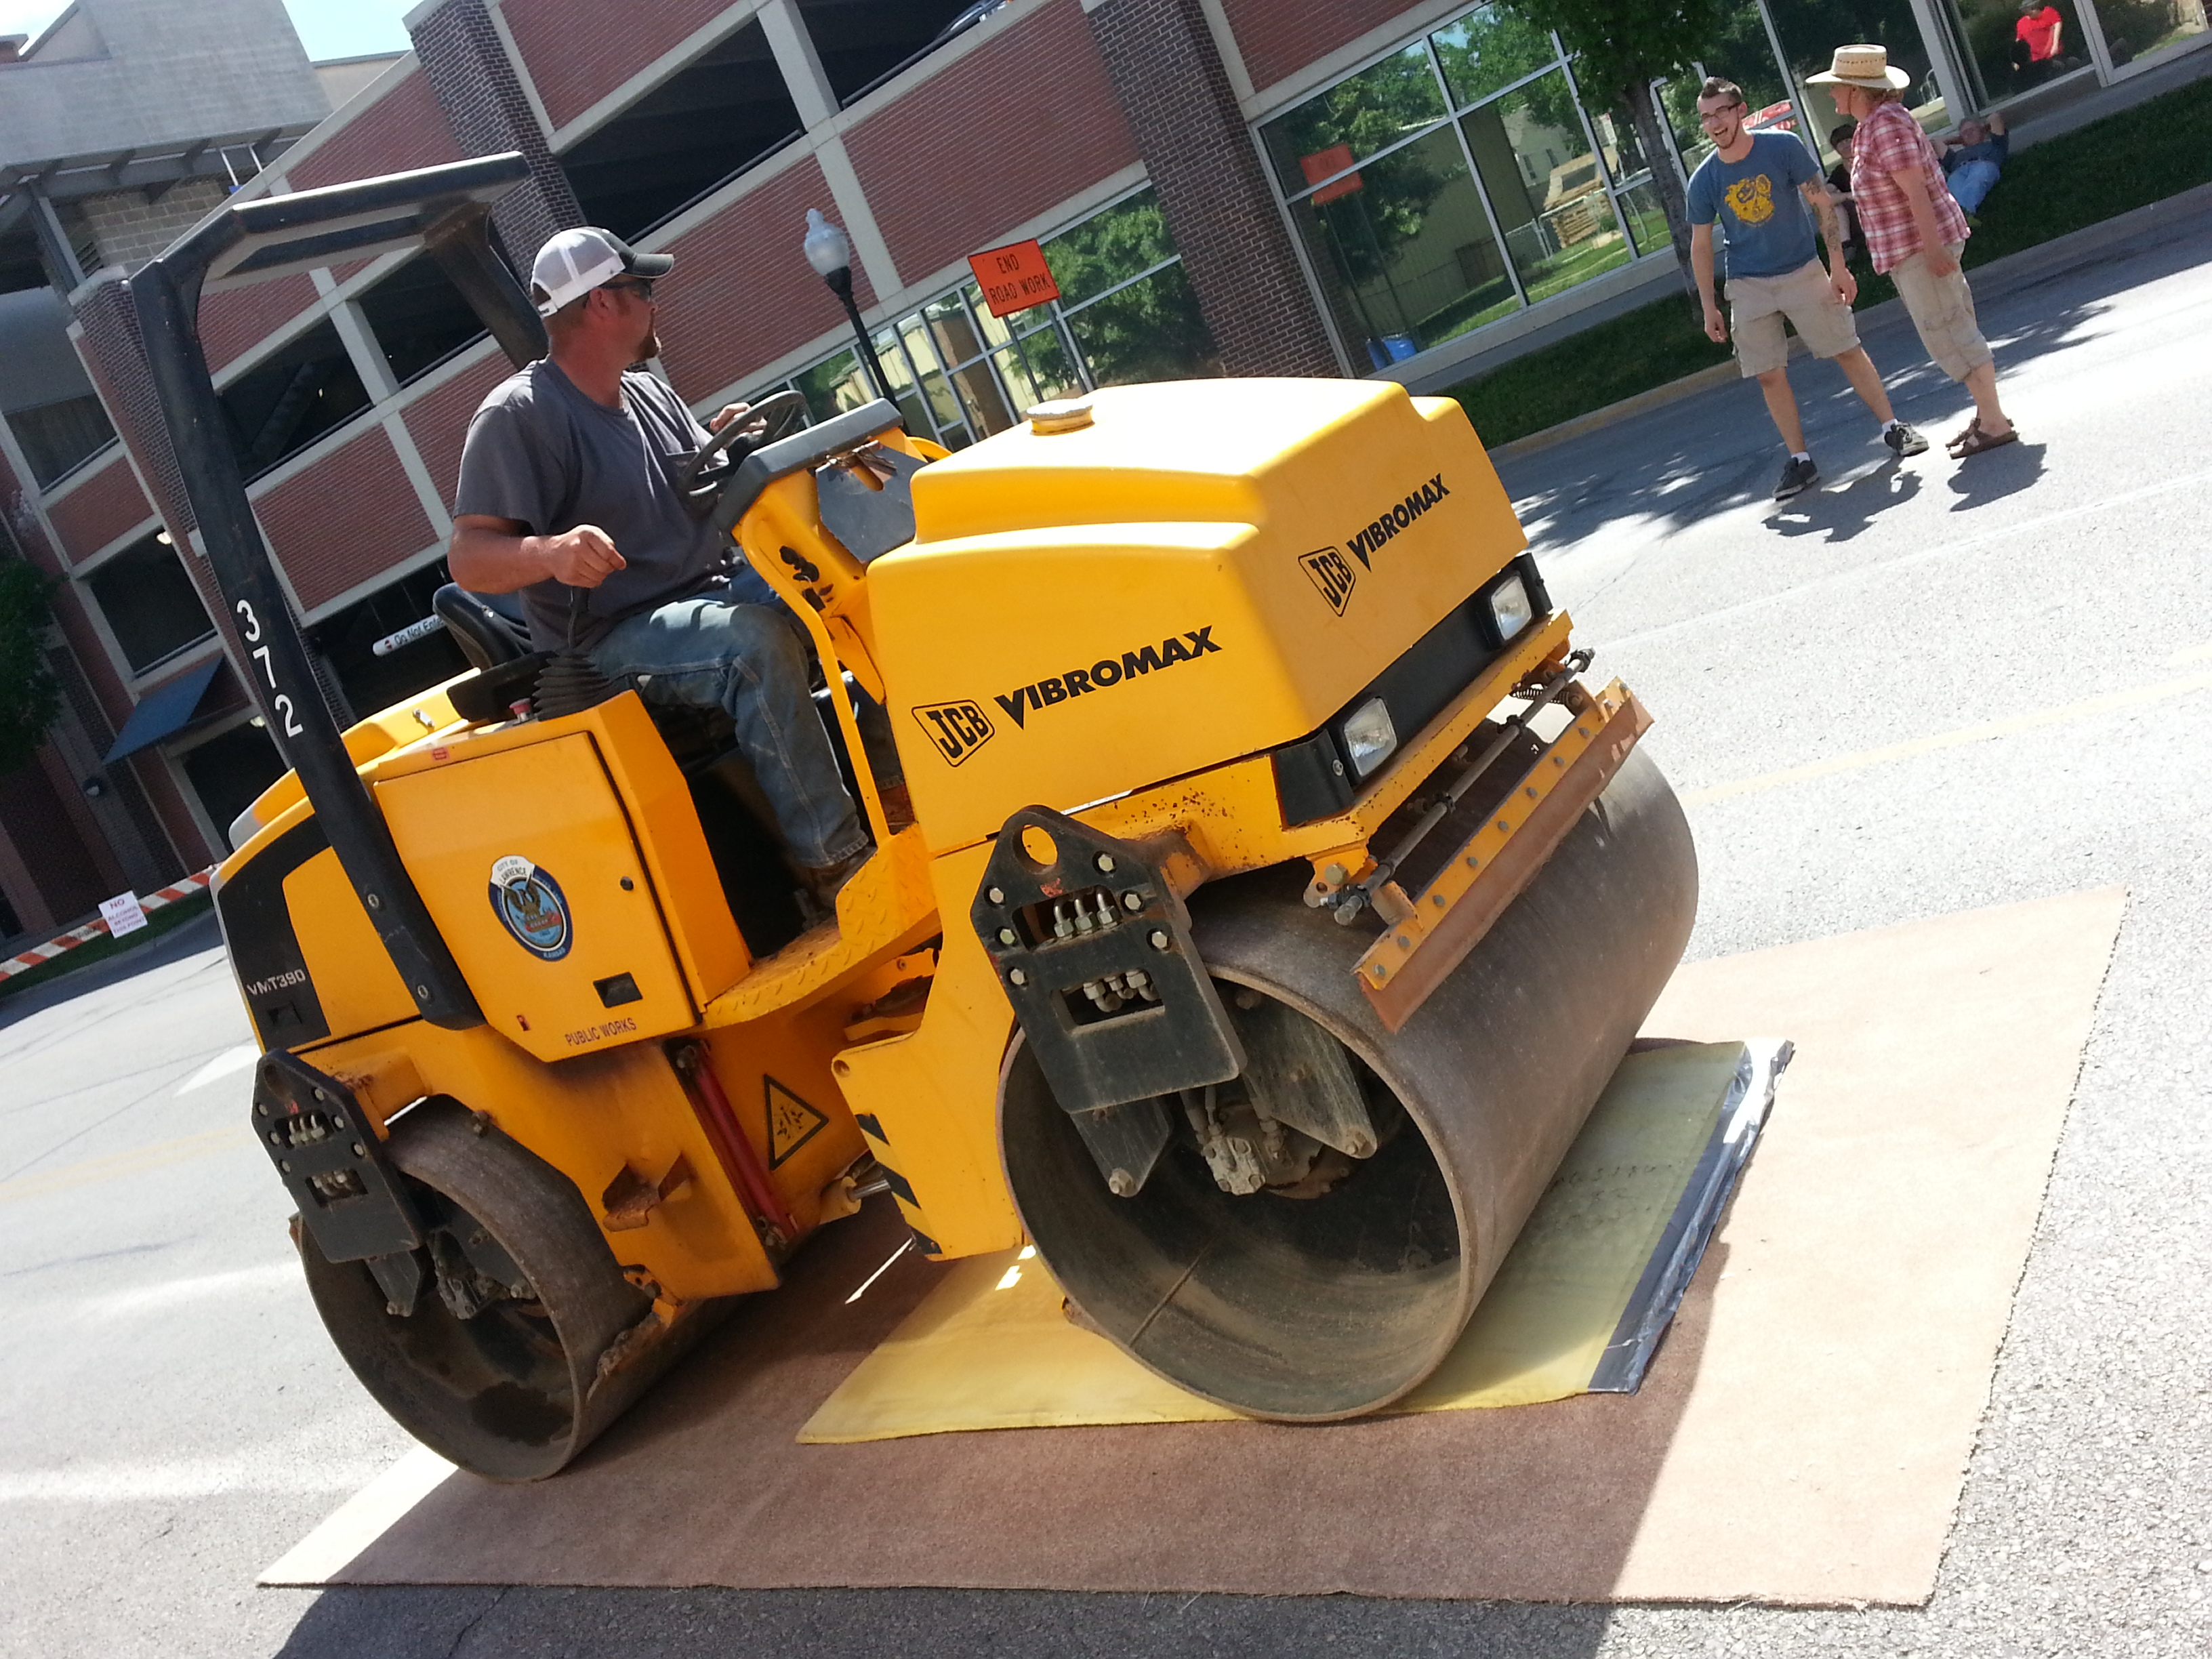
Steam roller on plate!
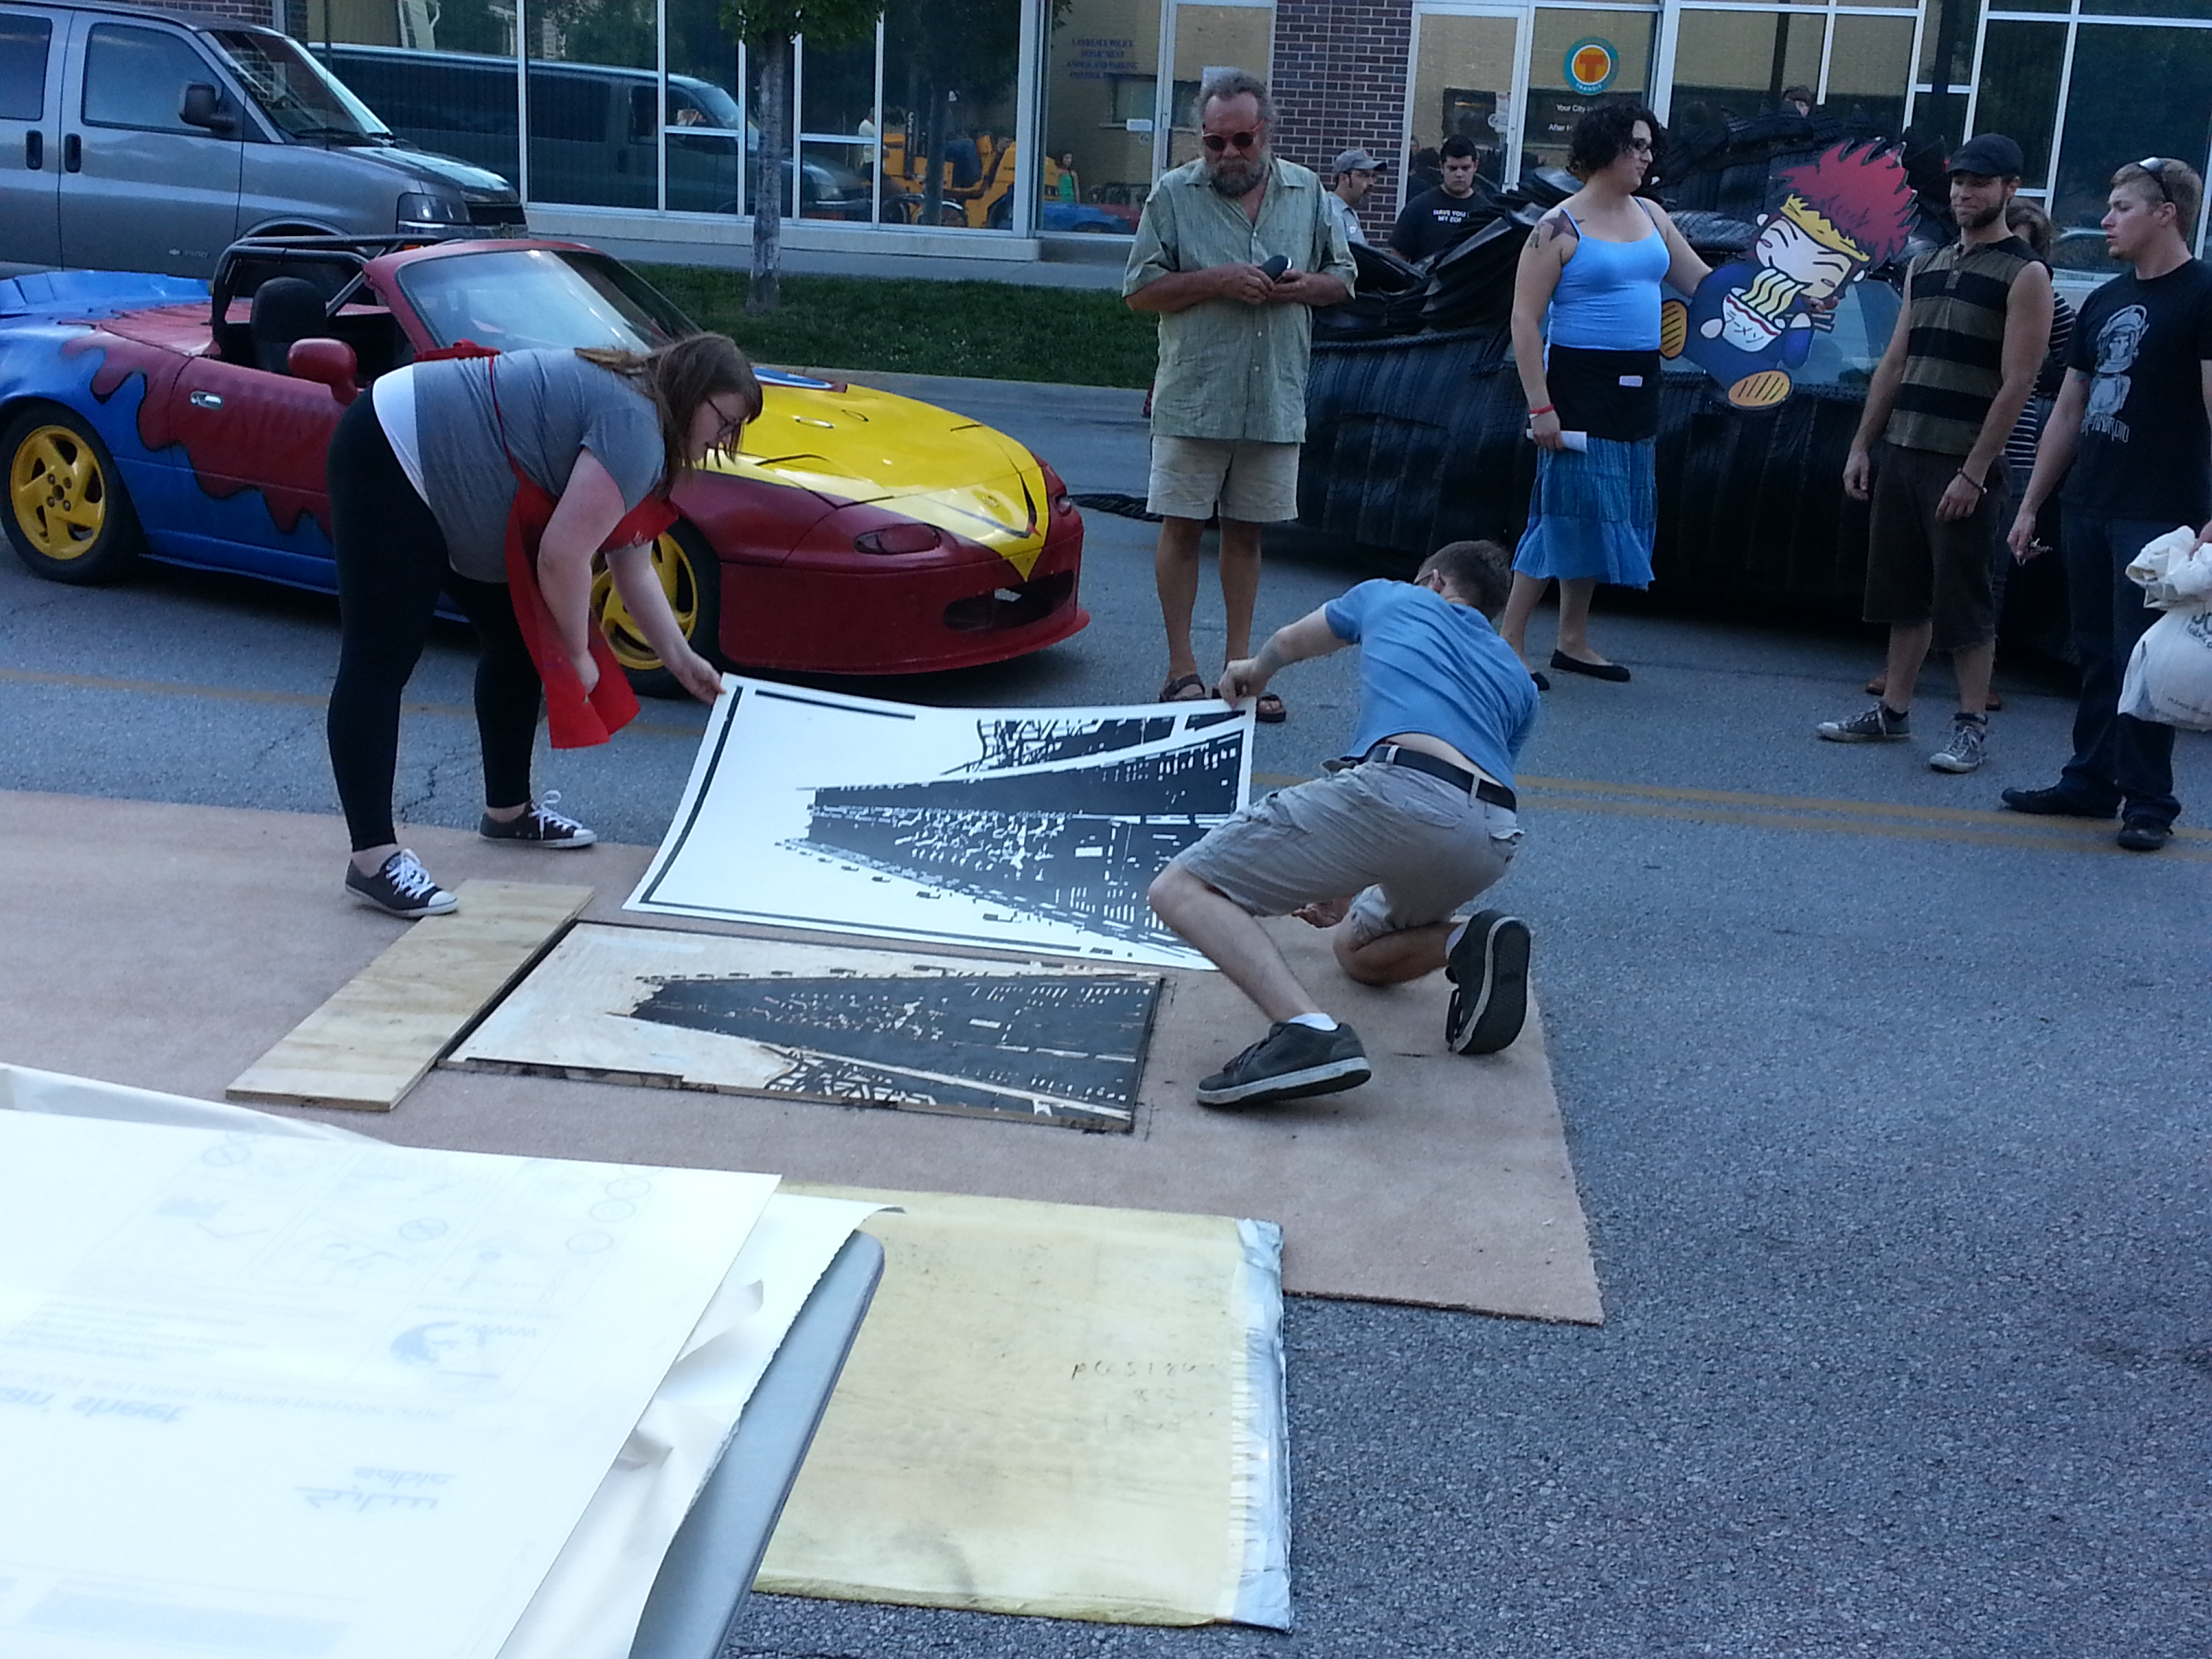
paper pulled off plate! IT PRINTED!!

Finished print! still wet needs to dry.
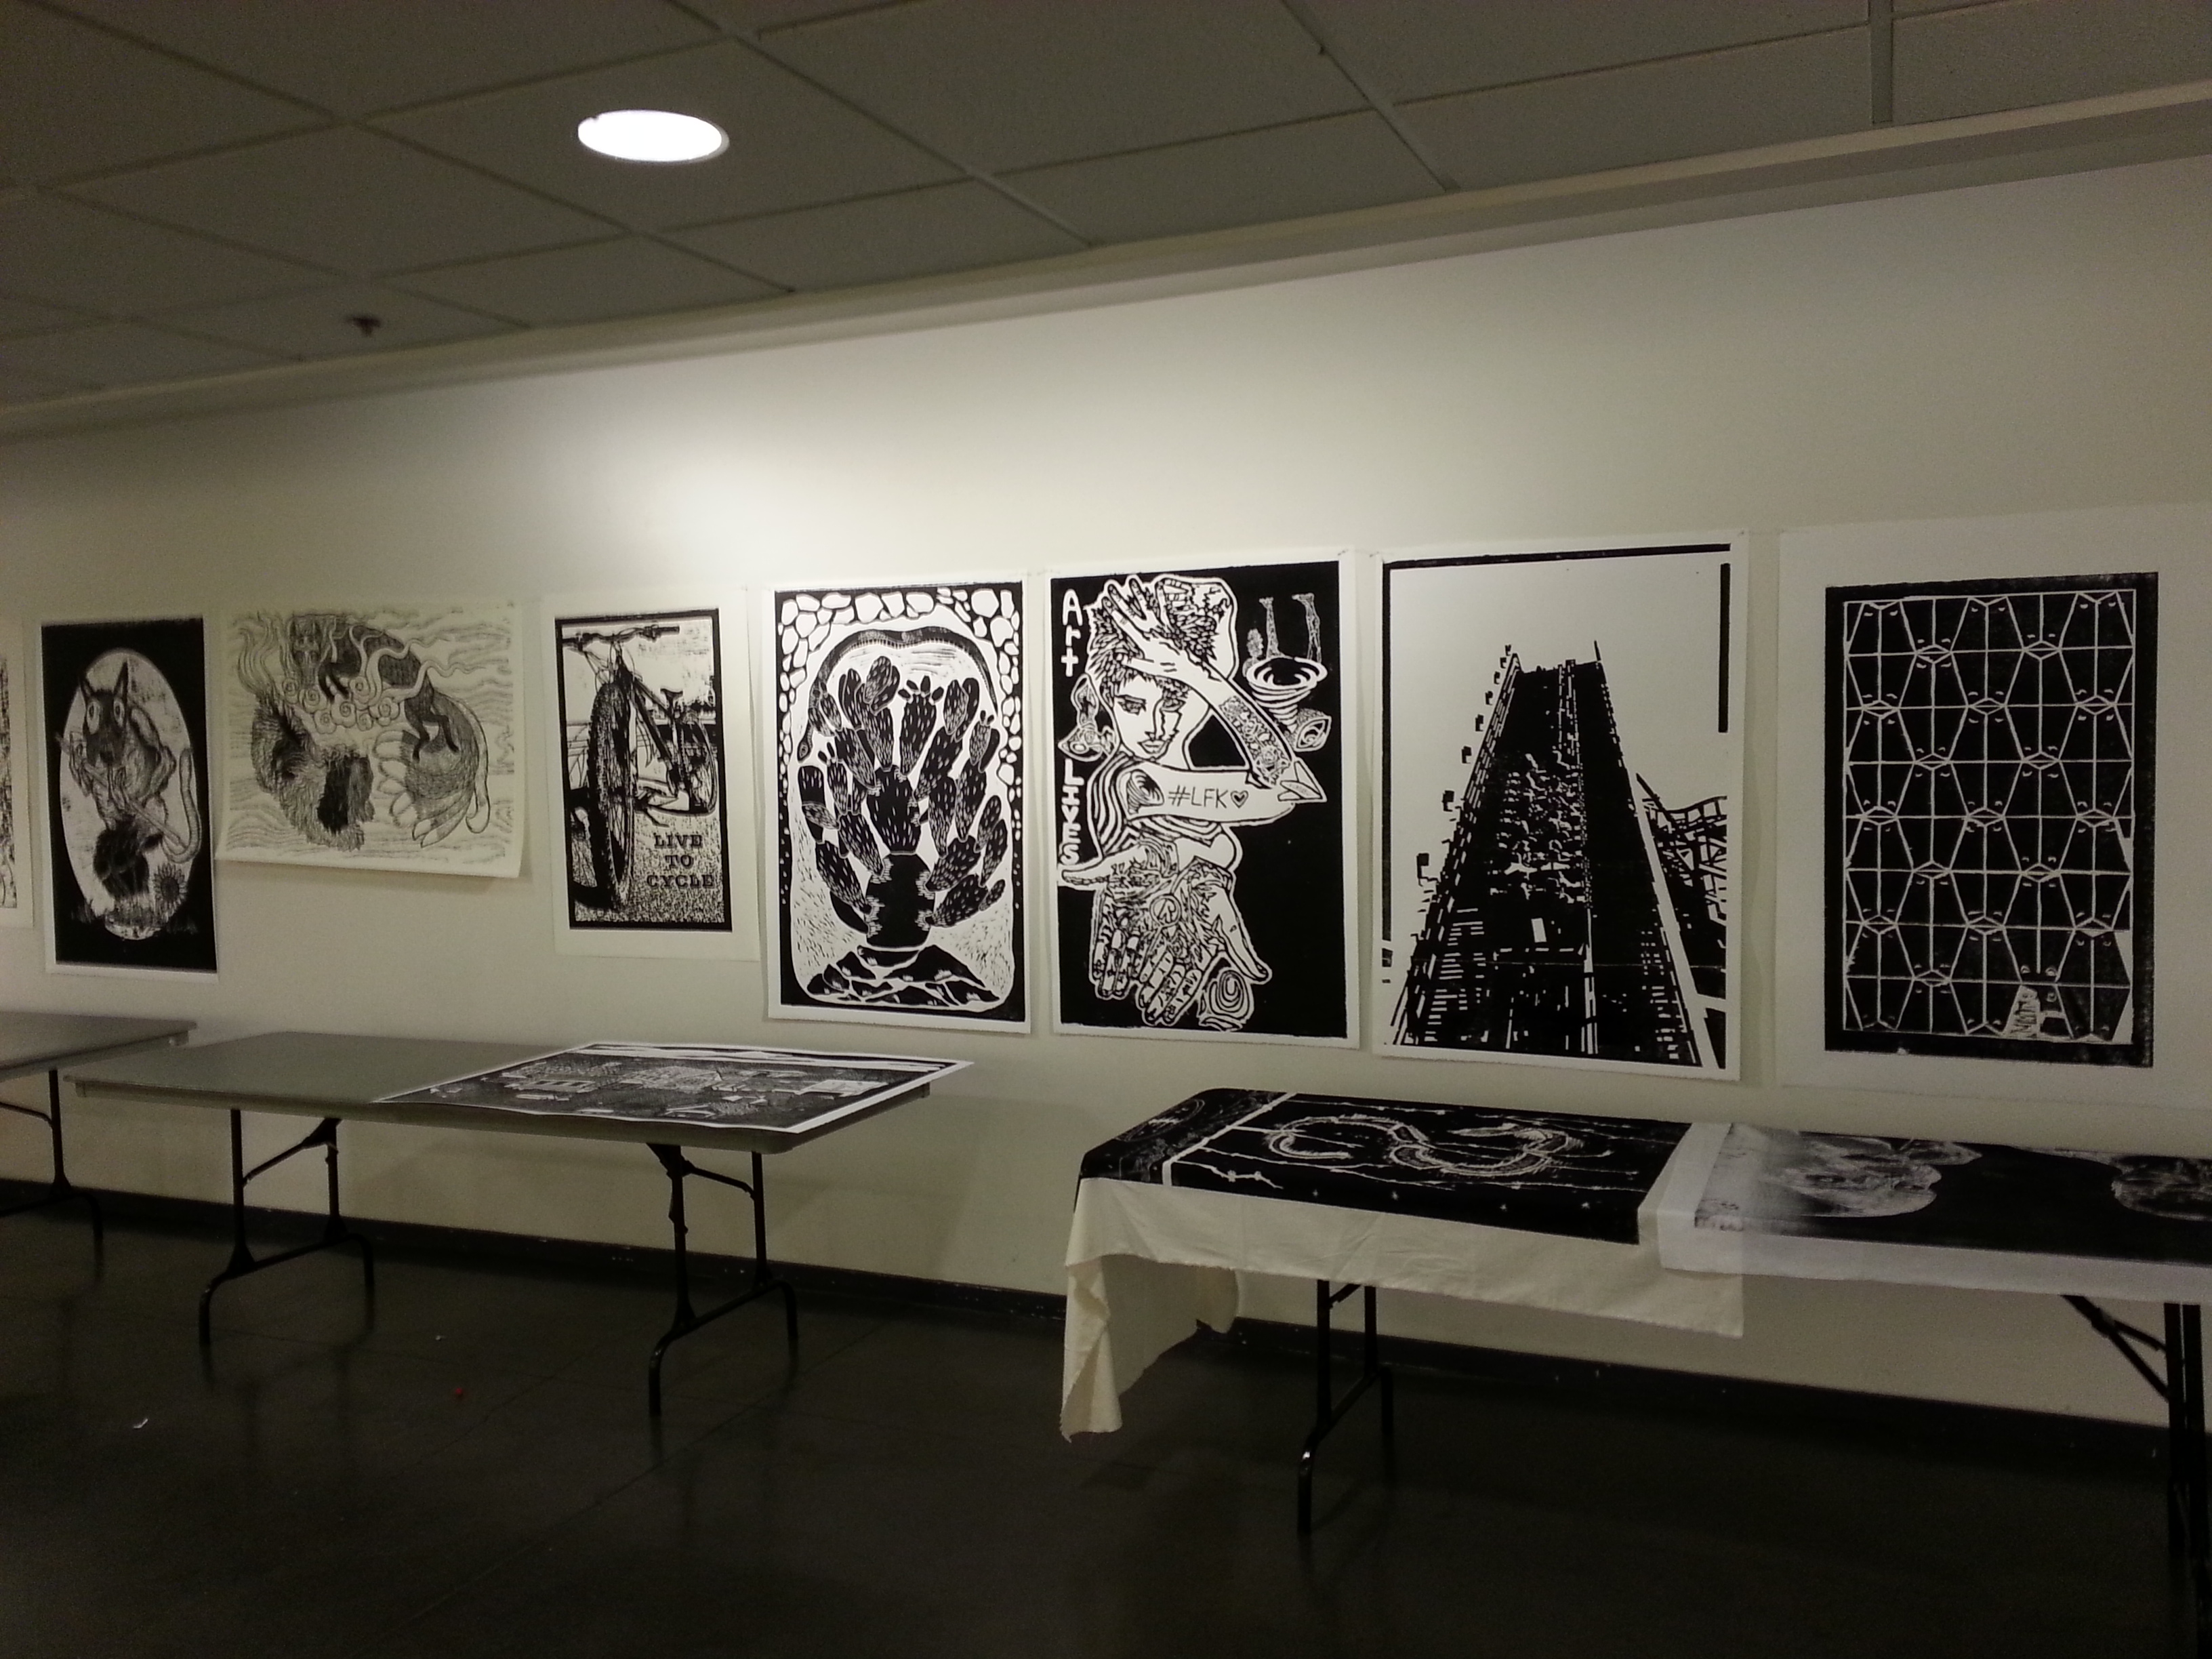
prints displayed on wall at Lawrence arts center


Primed my 48″x 32″ wood cut for tomorrows Lawrence Art Center’s Art Tougeau Steer Party. We are using a steam roller to print plates!


75th Street Intersection 2012 22×13 monoprint

Sometimes images appear that are too beautiful to not capture! This picture was taken with a camera phone and is now the inspiration for a new series of prints I am making! My son actually took it while we were dashing to the grocery store. Between the poor camera quality and the intense sky it provides a stunning start to a print!

Kansas sky at sunset

Here are the current images I am working on for my weekend Printmaking class at the Kansas City Art Institute. These pictures were taken on the way to the grocery store one night. This reinforces my belief that beauty and intriguing images are constantly around us if we take the time to stop, look and study.

Kansas Sunset dark sky bright horizon. 75th and Belinder


potential print?
some times I take pictures to think about. Hoping to use the colors and light for a future print…


You must be logged in to post a comment.