
Steam Roller Printing Explained Step by Step
This print was created during a class at the Lawrence Art Center. The finale was May 30th 2014 when a Steam Roller was used to print the plate during the Art Tougeau event.

initial image
- Step one is figuring out the image! Whew this is the stressful part for any artist. A wood cut is an image cut into wood in our case 32” x 48” piece of plywood. Every place that is cut or the top layer of wood removed will not hold ink so that is white or the color of the paper. I think of it as the cut away area is protected from ink. The roller that applies the ink doesn’t touch anyplace that is recessed. For this Steamroller class the plate will be printed once so we have one color the black printer’s ink. The image will be black and white no gray or any other color. I have been described as a colorist “a painter able to achieve special effects with color”. As a printer who LOVES color that meant I needed a strong image that didn’t need any color such a blue sky or a middle gray to explain depth or distance to tell the story. As an architect too I tend to imagine the finished piece of art just as I can see a building project while it is being designed. Knowing that a steam roller was going to print it meant that fine lines may not work well as the sheer compression from the roller may smudge them out. Also in the back of my mind was a comment from an art show opening I had last fall from someone viewing my work “You seem much more fun that your work shows. Your work is somewhat dark and moody” Ugh I do like light and dark but have been wanting to lighten up! Also knowing that this was going to take many weeks with MANY hours to carve I wanted an image I wouldn’t tire of. I try to bring my family into my work too either by having them take picture with my camera phone or pick an image I have taken. I searched through the hundreds of images on my phone and decided that a picture from spring break at Silver Dollar City with the entire family would be fun and bold enough to keep me going for weeks. I took this picture of my family riding the new OUTLAW RUN roller coaster. I waited on the viewing platform! Big roller coasters especially ones that go upside down are not for me anymore! I do think the combination of a picture of a new wood roller coaster using a wood plate printed with a steam roller is fun!
- Image transfer. I took the image and printed it full size using a printer/copier that prints architectural drawings to scale in black and white. Using the drawing at full scale I transferred it to the plywood using transfer paper. I teach a first year Architectural Studio at UMKC where we have a two week sketch workshop focusing on drawing technique. Angular lines are powerful is one my favorite sayings! If you notice most of the lines are straight and at right angles very few curves. It keeps the drawing crisp and not fuzzy or fussy! After the image was transferred to the board I outlined everything with a sharpie and colored some areas that were tricky to know what was going to be cut. Going from color to back and white requires taking liberty to ensure that the image can still be understood.
- Carving! This took quite a bit of thought before we started. The we being my husband plus me! There was so much white we needed a plan on how to clear away that area of the board. We could have cut the board to that shape but we wanted to keep the board a rectangle. We experimented with a router. It was quick and easy and if we had more bits might have used it for more cuts! More carving the large areas were cleared with a router now came the detailed fine hand cut areas.

Using router to make first cuts on wood cut. Router was used to clear lager areas of plate. Image was drawn on plywood sheet 48″ x 32″ using a sharpie
Step 2 thru 20,00o!
Many many cuts by hand 
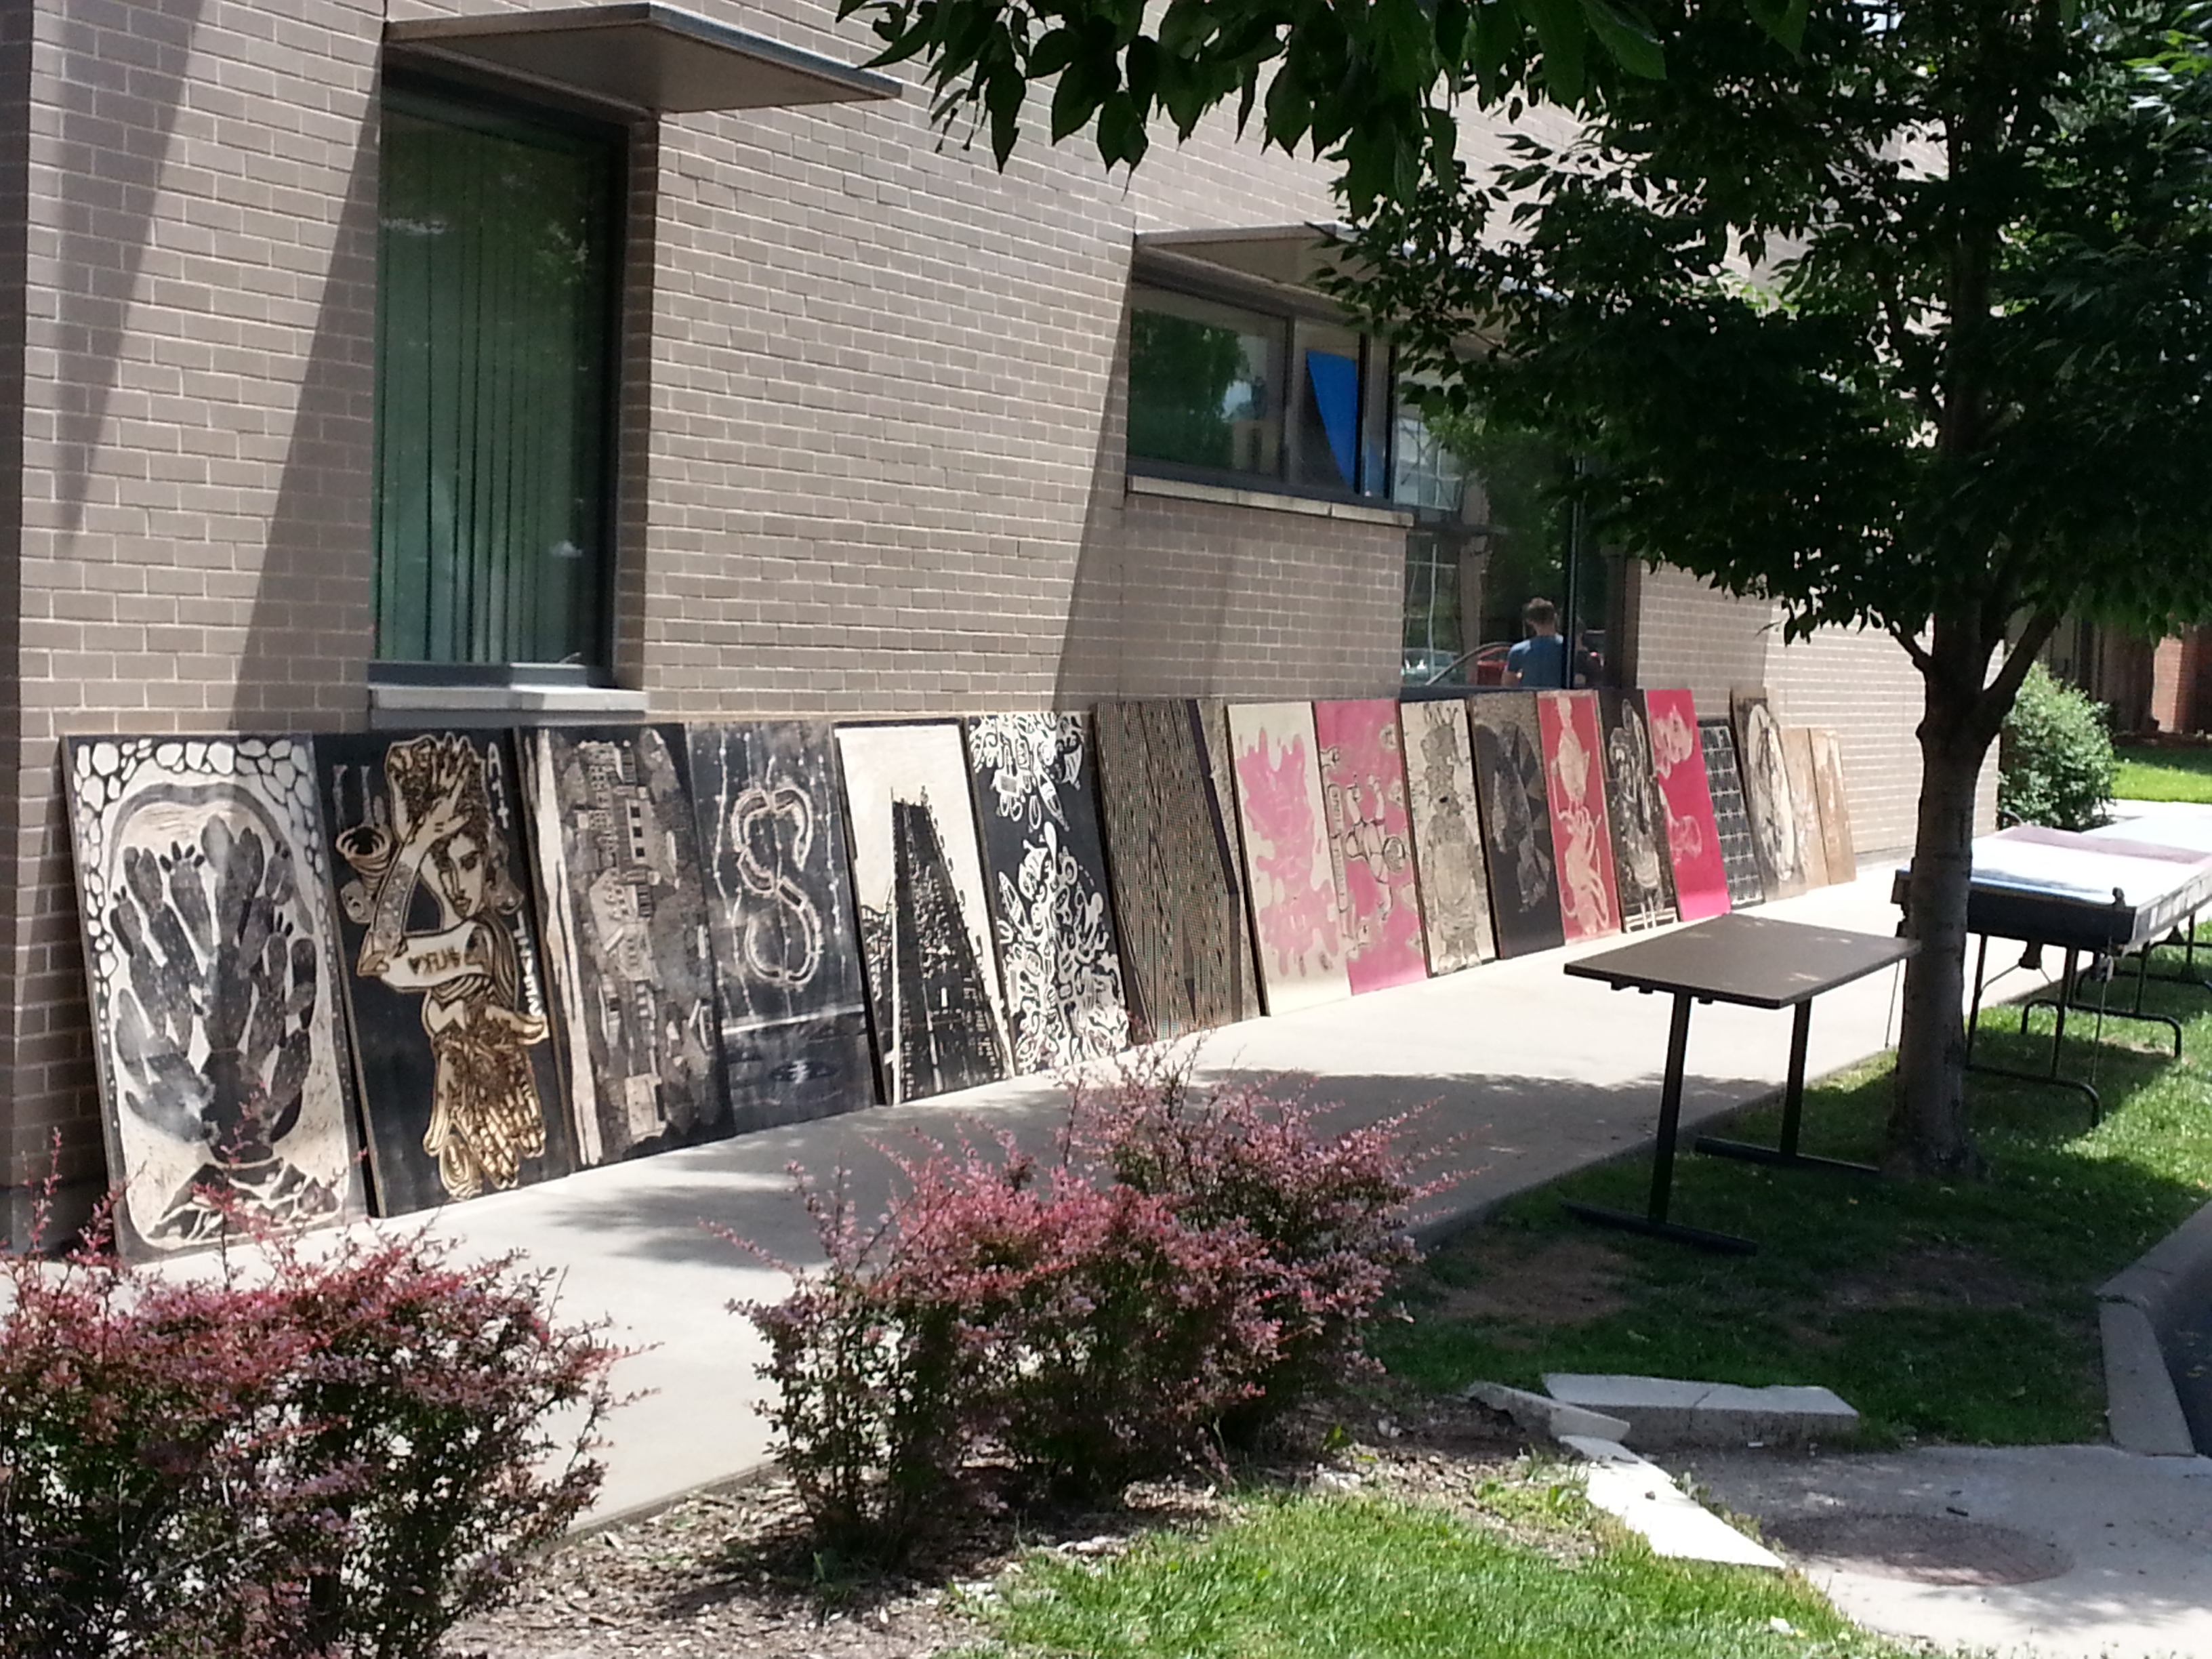
Carved plywood and MDF plates waiting to go at Lawrence Arts Center!
Step 3 priming finished plate

Plate being inked!

Plate moved to street!

Paper being placed on plate, centered aligned and straight!

Steam roller. Standing on plate until steam roller engaged it keeps it from sliding and smearing ink!
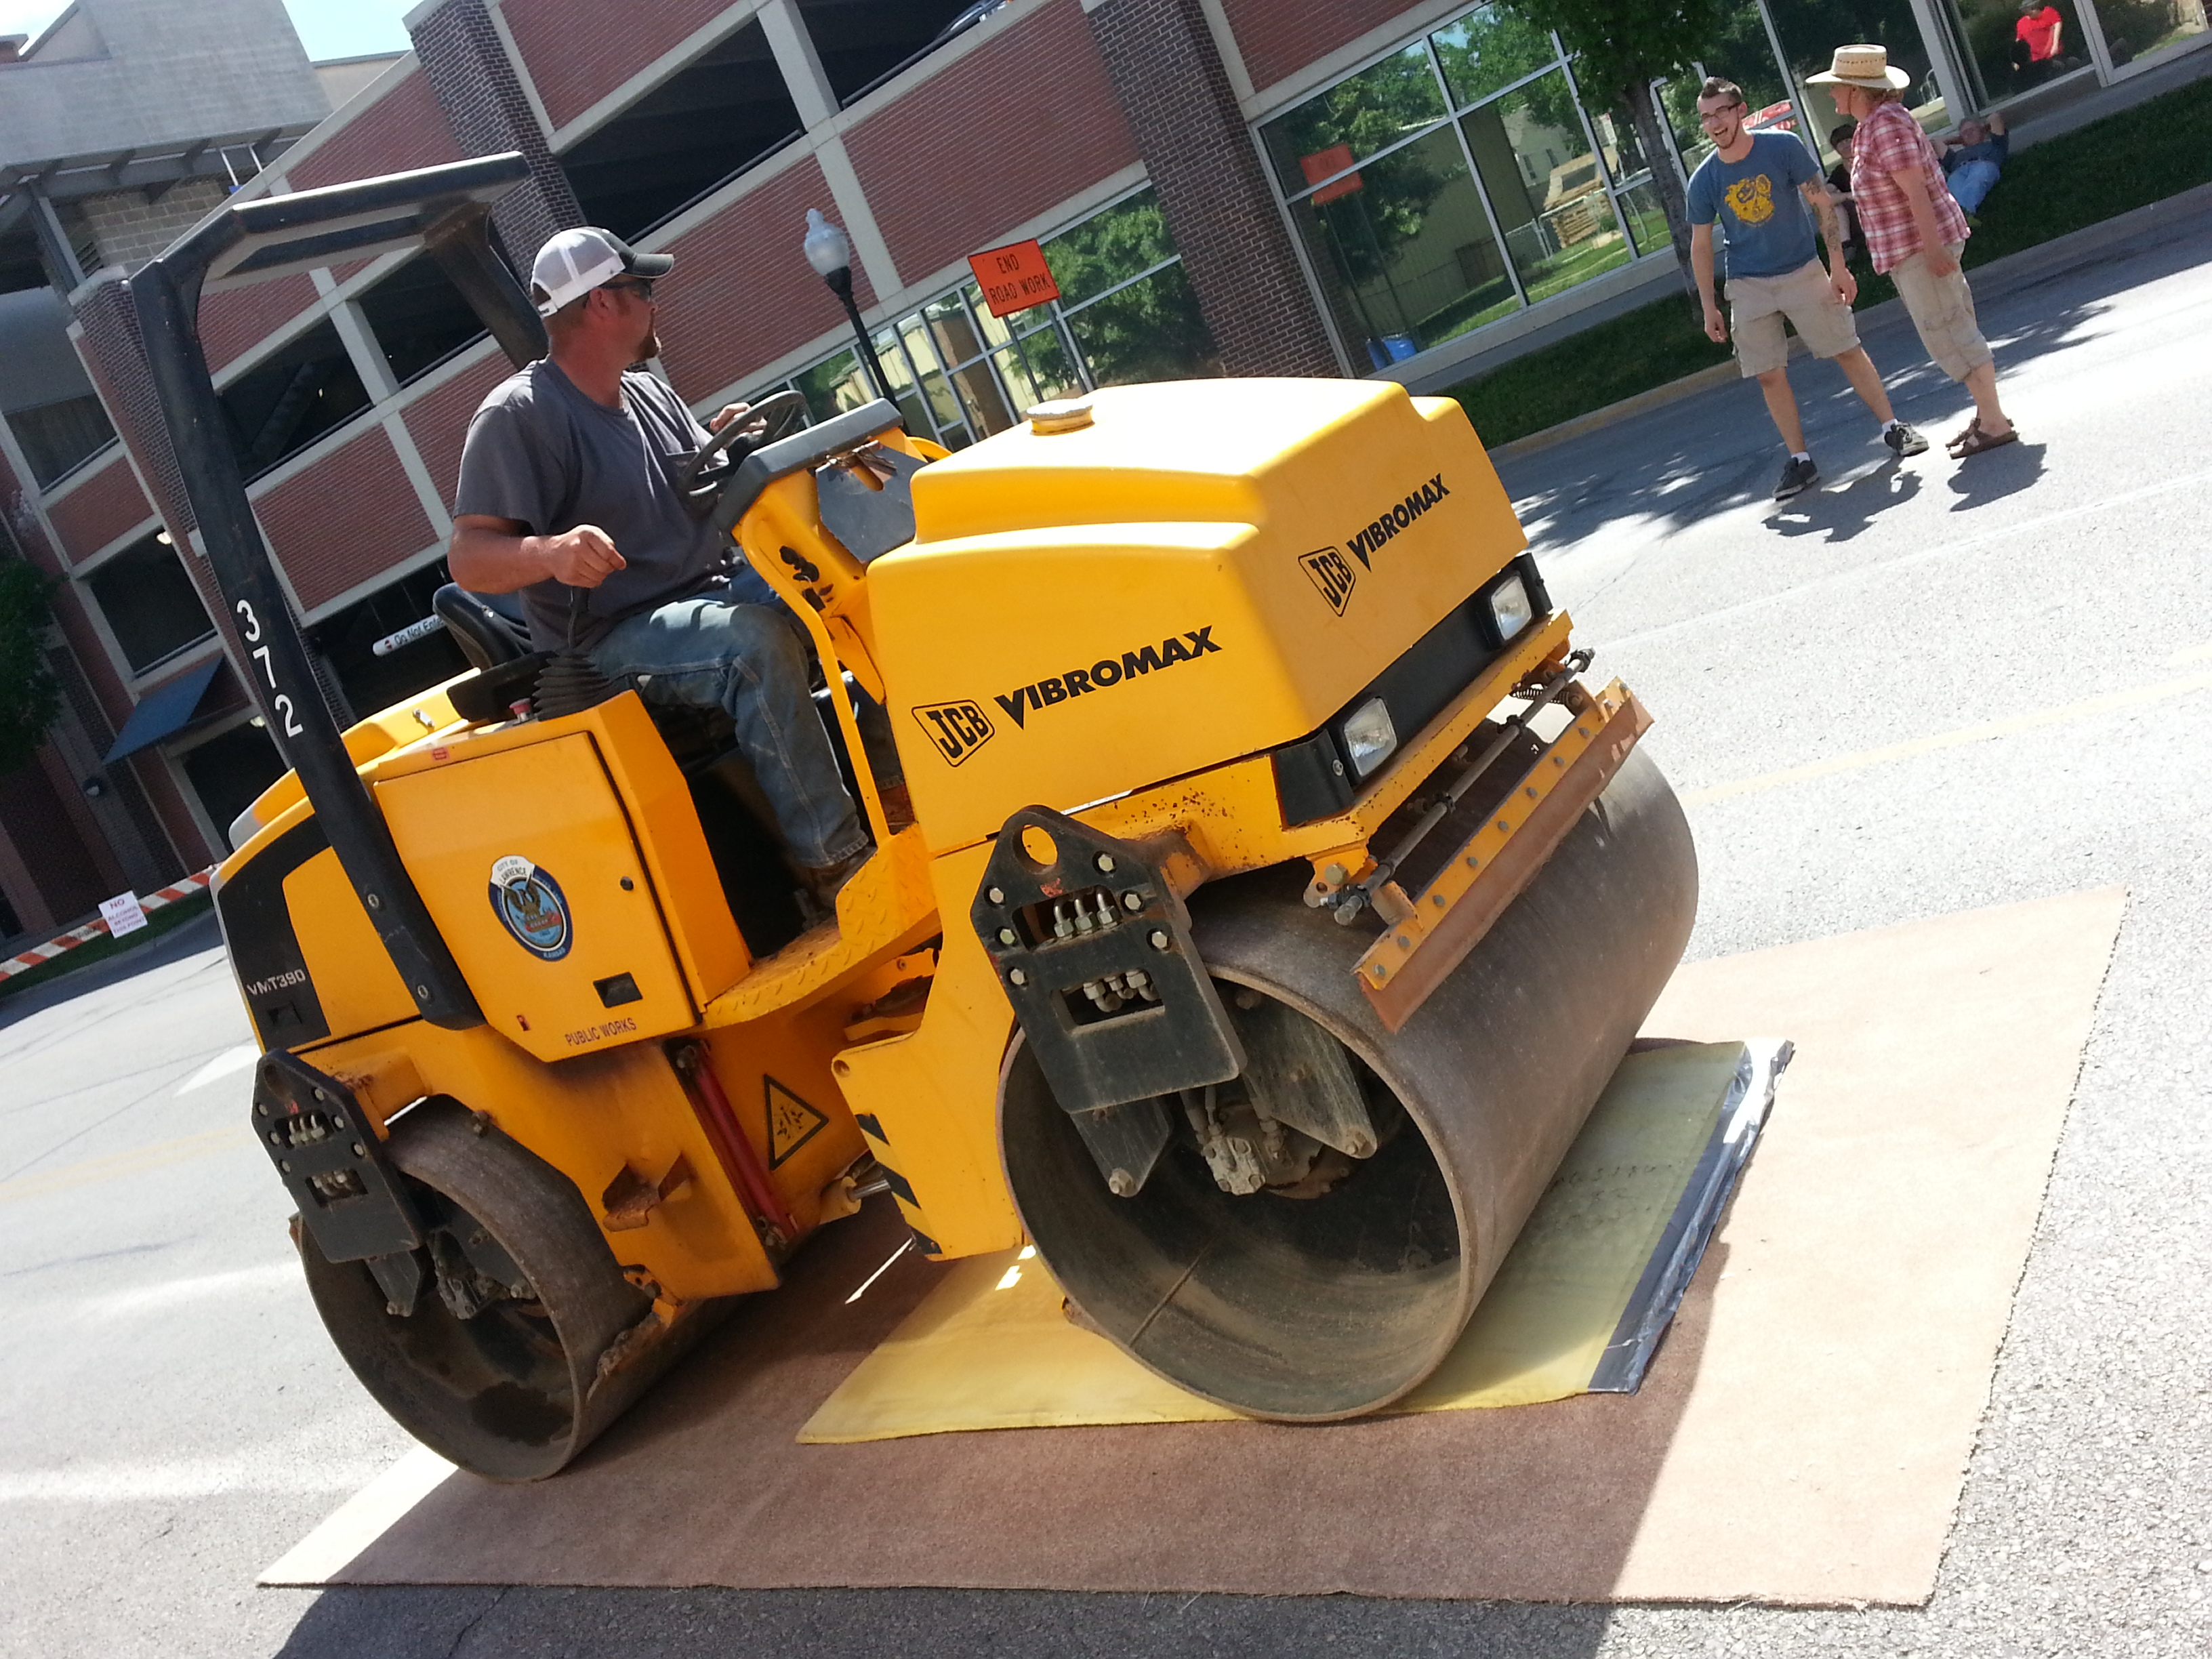
Steam roller on plate!
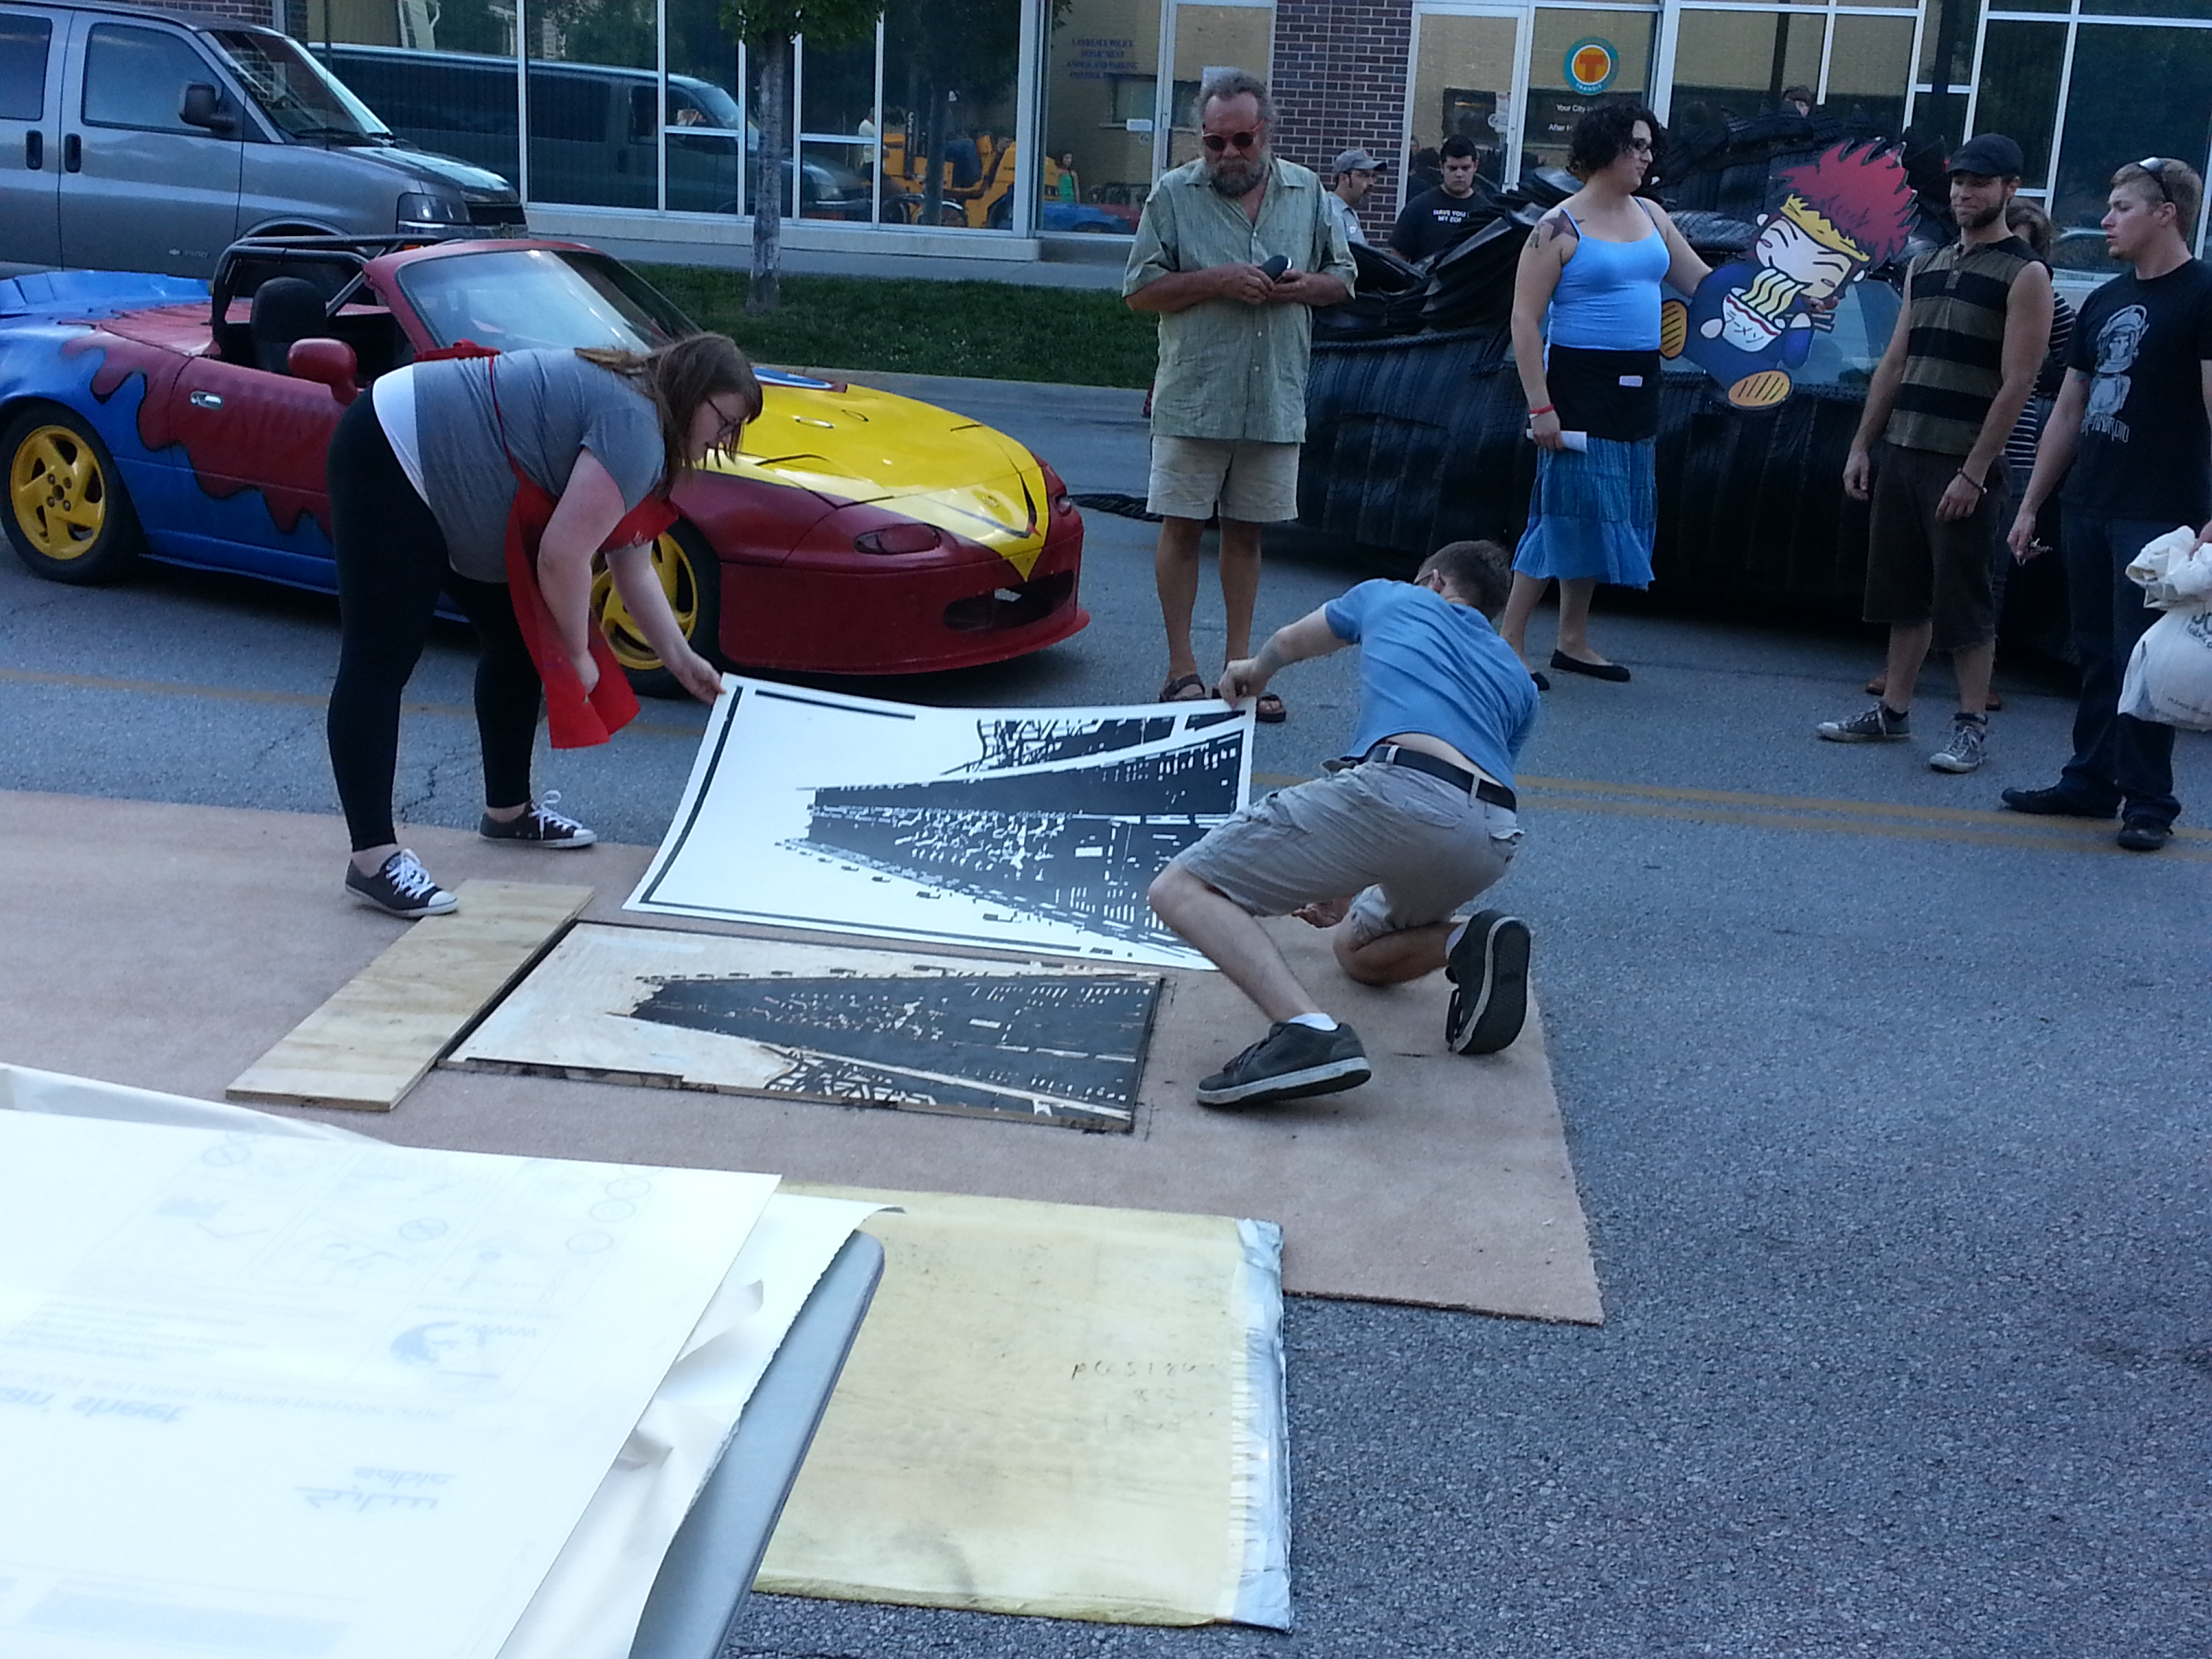
paper pulled off plate! IT PRINTED!!

Finished print! still wet needs to dry.
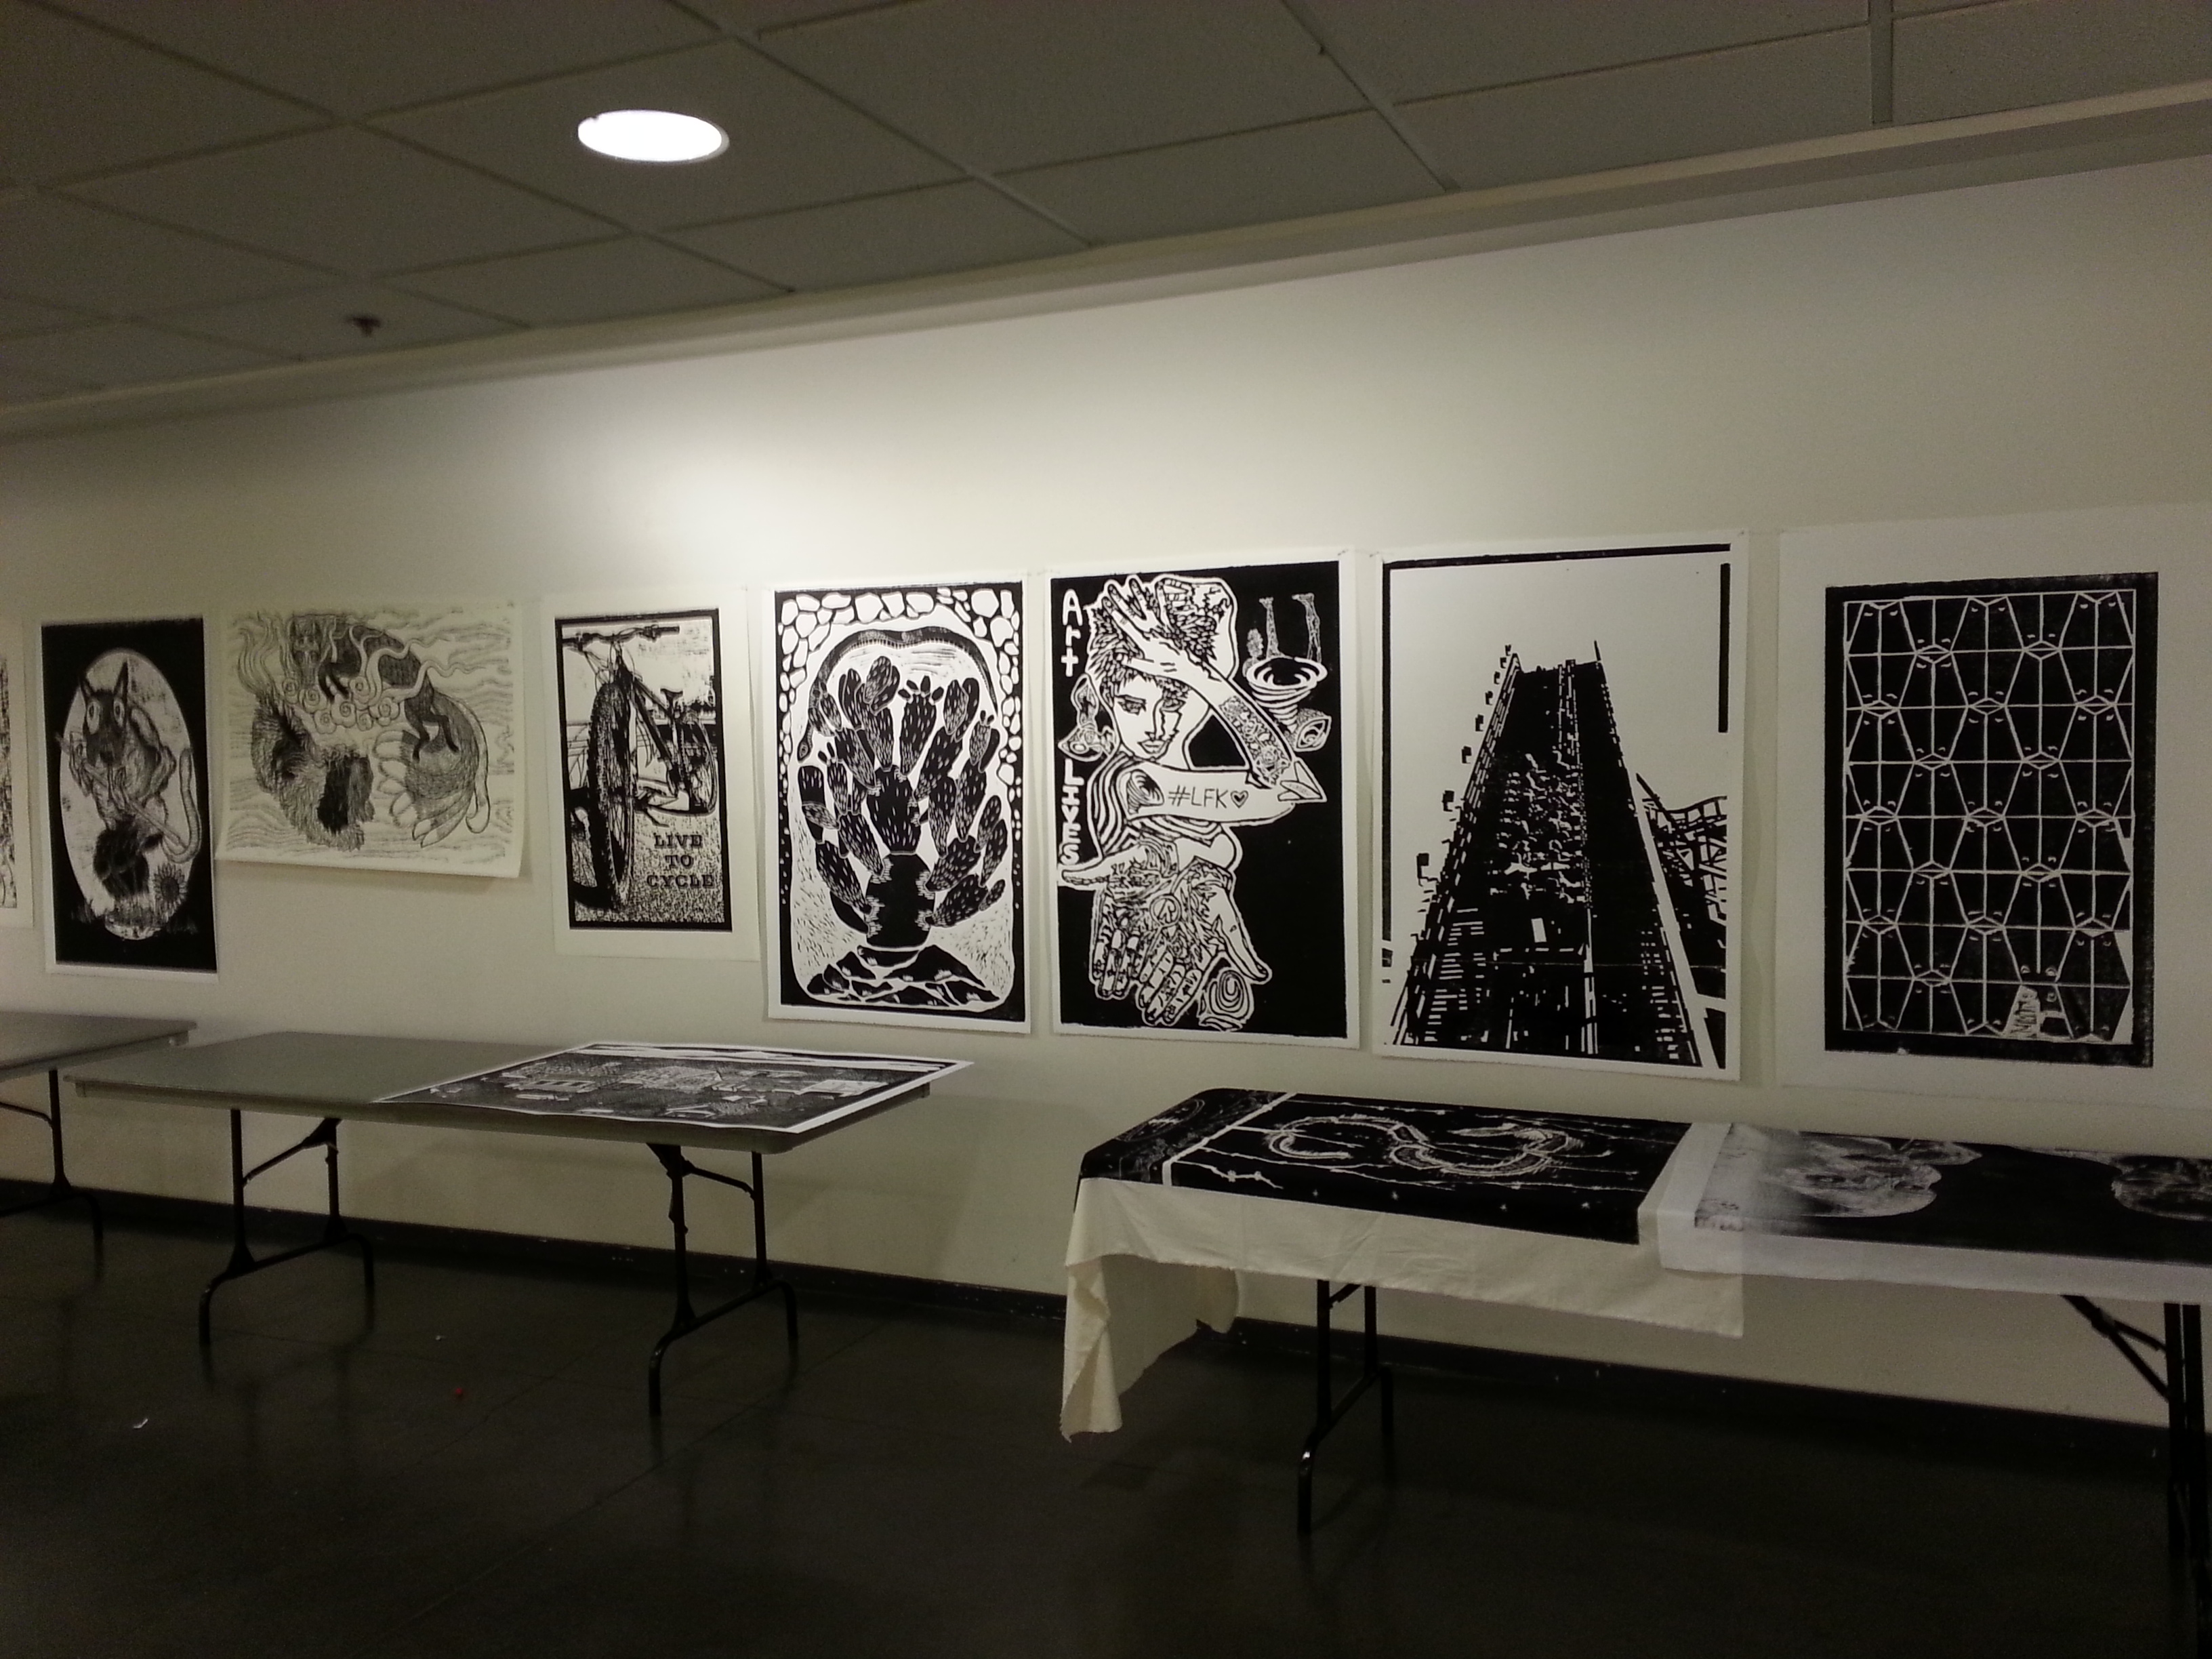
prints displayed on wall at Lawrence arts center

One thought on “Step by Step Steamroller Printmaking”